Replace HDD in Server Chassis on Linux
In this scenario I want to replace a HDD in my ZFS tank0 pool. The pool has grown from 4 TB across 3 HDDS to 8TBs. I have swapped out two of the HDDs in the pool but I’m needing to swap out the last one to finally start using 8TB of storage where right now I’m stuck at 4TB.
Now, I have several things I can do to swap out this hard drive but since I didn’t use the /dev/by-disk or /dev/by-id labels and all of my HDDs in my zpool pull are labeled as /dev/sdx, I don’t know which one it currently is I’m needing to replace.
I do have my pool labeled so I know physically on the server the three drives that consist of my tank0 dataset but I don’t know which one is the 4TB drive in my server chassis.
Since I have a RAID-z1 across 3 drives I have a 33% of randomly choosing the right one. If I did pull the wrong one, it would have a enter a degraded array state, but overall the array would still function without issue. If I then pulled another disk out though, I would effectively lose the entire array and it will lock it down to where no more writing could be done to it.
There will be some room for error due to ZFS’s use of RAM which will allow me to re-pop in the drives and resilver them, effectively bringing them backup up to working drives, but this process could take several hours up to several days.
So we’ll use the smart more methodical path and also identify our drives for the future so we don’t run into this issue again.
Locating and identifing the HDDs
I have two arrays in my proxmox server. One is the rpool which sits on two SSDs and the other is my tank0 which are on the three HDDs mentioned earlier. Running zpool status shows my pools are healthy and that sdb, sdc, and sdd make up tank0.
$ sudo zpool status
pool: rpool
state: ONLINE
scan: scrub repaired 0B in 0 days 00:00:40 with 0 errors on Sun Jan 9 00:24:41 2022
config:
NAME                                                     STATE     READ WRITE CKSUM
rpool                                                    ONLINE       0     0     0
  mirror-0                                               ONLINE       0     0     0
    ata-Samsung_SSD_860_PRO_512GB_S419NF0M703932R-part3  ONLINE       0     0     0
    ata-Samsung_SSD_860_PRO_512GB_S419NF0M703481E-part3  ONLINE       0     0     0
errors: No known data errors
pool: tank0
state: ONLINE
scan: scrub repaired 0B in 0 days 03:06:50 with 0 errors on Sun Jan 9 03:30:52 2022
config:
NAME        STATE     READ WRITE CKSUM
tank0       ONLINE       0     0     0
  raidz1-0  ONLINE       0     0     0
    sdb     ONLINE       0     0     0
    sdc     ONLINE       0     0     0
    sdd     ONLINE       0     0     0
errors: No known data errors
You can see that the rpool is using the proper identification the “/dev/disk/by-id” identifier which is what the tank0 should be using but I created this array when I was still new-ish to ZFS, therefore my faux pas.
Let’s identify which device is the 4TB HDD we want to replace using lsblk and fdisk -l commands.
waynes@security0:~$ lsblk
NAME MAJ:MIN RM SIZE RO TYPE MOUNTPOINT
loop0 7:0 0 16G 0 loop
loop1 7:1 0 2G 0 loop
loop2 7:2 0 12G 0 loop
sda 8:0 0 477G 0 disk
├─sda1 8:1 0 1007K 0 part
├─sda2 8:2 0 512M 0 part
└─sda3 8:3 0 476.4G 0 part
sdb 8:16 0 3.7T 0 disk
├─sdb1 8:17 0 3.7T 0 part
└─sdb9 8:25 0 8M 0 part
sdc 8:32 0 7.3T 0 disk
├─sdc1 8:33 0 7.3T 0 part
└─sdc9 8:41 0 8M 0 part
sdd 8:48 0 7.3T 0 disk
├─sdd1 8:49 0 7.3T 0 part
└─sdd9 8:57 0 8M 0 part
sde 8:64 0 477G 0 disk
├─sde1 8:65 0 1007K 0 part
├─sde2 8:66 0 512M 0 part
└─sde3 8:67 0 476.4G 0 part
zd0 230:0 0 32G 0 disk
waynes@security0:~$ sudo fdisk -l
...

Disk /dev/sdb: 3.7 TiB, 4000787030016 bytes, 7814037168 sectors
Disk model: ST4000VN008-2DR1
Units: sectors of 1 * 512 = 512 bytes
Sector size (logical/physical): 512 bytes / 4096 bytes
I/O size (minimum/optimal): 4096 bytes / 4096 bytes
Disklabel type: gpt
Disk identifier: 98202188-1C19-C044-AC8A-3CBED4BE091C

Device          Start        End    Sectors  Size Type
/dev/sdb1        2048 7814019071 7814017024  3.7T Solaris /usr & Apple ZFS
/dev/sdb9  7814019072 7814035455      16384    8M Solaris reserved 1


Disk /dev/sdc: 7.3 TiB, 8001563222016 bytes, 15628053168 sectors
Disk model: ST8000NM0055-1RM
Units: sectors of 1 * 512 = 512 bytes
Sector size (logical/physical): 512 bytes / 4096 bytes
I/O size (minimum/optimal): 4096 bytes / 4096 bytes
Disklabel type: gpt
Disk identifier: 7F253127-25AA-4C40-B6D4-7F72217552D0

Device           Start         End     Sectors  Size Type
/dev/sdc1         2048 15628036095 15628034048  7.3T Solaris /usr & Apple ZFS
/dev/sdc9  15628036096 15628052479       16384    8M Solaris reserved 1


Disk /dev/sdd: 7.3 TiB, 8001563222016 bytes, 15628053168 sectors
Disk model: ST8000NM0055-1RM
Units: sectors of 1 * 512 = 512 bytes
Sector size (logical/physical): 512 bytes / 4096 bytes
I/O size (minimum/optimal): 4096 bytes / 4096 bytes
Disklabel type: gpt
Disk identifier: 0718B746-CAD3-714B-882B-DFCE8BC1986F

Device           Start         End     Sectors  Size Type
/dev/sdd1         2048 15628036095 15628034048  7.3T Solaris /usr & Apple ZFS
/dev/sdd9  15628036096 15628052479       16384    8M Solaris reserved 1

...
I excluded the other storage devices that we don’t need to see from the output text above. We can see that the /dev/sdb is the only 3.7 (4TB) drive we have so we know that is the one.
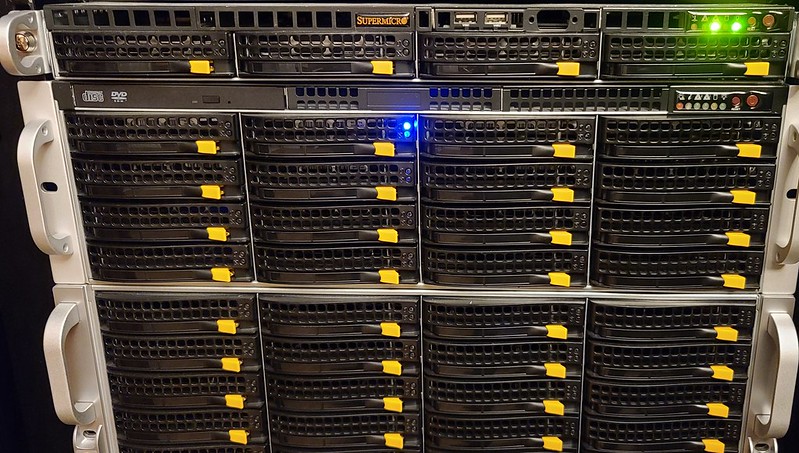
Next, lets use a program called ledmon/ledctl to let us see which drive is the one we want to remove by lighting up the HDD light on the server chassis. You might need to install the ledctl or ledmon program from your package manager. For my Debian server I installed ledmon via apt which contains the package ledctl as well.
waynes@security0:~$ sudo ledctl locate=/dev/sdb
waynes@security0:~$
You will notice that we get no notification that anything happened but if I walk over to the server room, I find my chassis’ bay light has been turned on.
The red flashing light signifies that that is the /dev/sdb corresponding drive and that is the HDD we are needing to replace.
After removing the HDD and running zpool status it shows us the pool is in a degraded state now.
waynes@security0:~$ sudo zpool status
[sudo] password for waynes:
...
pool: tank0
state: DEGRADED
status: One or more devices could not be used because the label is missing or
invalid. Sufficient replicas exist for the pool to continue
functioning in a degraded state.
action: Replace the device using 'zpool replace'.
see: http://zfsonlinux.org/msg/ZFS-8000-4J
scan: scrub repaired 0B in 0 days 03:06:50 with 0 errors on Sun Jan 9 03:30:52 2022
config:
NAME        STATE     READ WRITE CKSUM
tank0       DEGRADED     0     0     0
  raidz1-0  DEGRADED     0     0     0
    sdb     UNAVAIL      3   275     0
    sdc     ONLINE       0     0     0
    sdd     ONLINE       0     0     0
errors: No known data errors
Even after physically replacing the drive with the 8TB the array will still shows it is in a degraded state, which is to be expected. We need to run some commands to get the pool back up and running correctly.
It says in the status section above that we need to run zpool replace but first let’s get the proper serial numbers from /dev/disk/by-id so that way were not depending on /dev/sdx anymore, for that drive at least.
I took a picture of my new drive before putting it in the HDD bay sled so I know that we are looking for a device that doesn’t have partitions but also ends in K45DM as per the SN.
$ ls -lah /dev/disk/by-id
...
lrwxrwxrwx 1 root root 9 Jan 17 12:01 ata-ST8000NM0055-1RM112_ZA1K45DM -> ../../sdb
...
You can see we found the new device but we can also see that it kept the /dev/sdb identifier.
Now lets run the new command to replace the old /dev/sdb device.
waynes@security0:~$ sudo zpool replace tank0 sdb /dev/disk/by-id/ata-ST8000NM0055-1RM112_ZA1K45DM
Again, we don’t get any confirmation that it worked but running zpool status will show us what is going on.
$ sudo zpool status
...
pool: tank0
state: DEGRADED
status: One or more devices is currently being resilvered.  The pool will
    continue to function, possibly in a degraded state.
action: Wait for the resilver to complete.
  scan: resilver in progress since Mon Jan 17 12:12:33 2022
    3.39T scanned at 22.2G/s, 438M issued at 2.81M/s, 3.55T total
    0B resilvered, 0.01% done, no estimated completion time
config:
NAME                                    STATE     READ WRITE CKSUM
tank0                                   DEGRADED     0     0     0
  raidz1-0                              DEGRADED     0     0     0
    replacing-0                         DEGRADED     0     0     0
      sdb                               UNAVAIL      3   275     0
      ata-ST8000NM0055-1RM112_ZA1K45DM  ONLINE       0     0     0
    sdc                                 ONLINE       0     0     0
    sdd                                 ONLINE       0     0     0
errors: No known data errors
We can see that sdb is still there but that ata-ST800xxx… is currently getting resilvered. We can now offline and detach the sdb drive from the zpool.
$ sudo zpool offline tank0 sdb
$ sudo zpool detach tank0 sdb
$ sudo status
pool: tank0
state: ONLINE
status: One or more devices is currently being resilvered.  The pool will
    continue to function, possibly in a degraded state.
action: Wait for the resilver to complete.
  scan: resilver in progress since Mon Jan 17 12:12:33 2022
    3.55T scanned at 8.84G/s, 90.7G issued at 226M/s, 3.55T total
    30.1G resilvered, 2.50% done, 0 days 04:27:17 to go
config:

    NAME                                  STATE     READ WRITE CKSUM
    tank0                                 ONLINE       0     0     0
      raidz1-0                            ONLINE       0     0     0
        ata-ST8000NM0055-1RM112_ZA1K45DM  ONLINE       0     0     0  (resilvering)
        sdc                               ONLINE       0     0     0
        sdd                               ONLINE       0     0     0

errors: No known data errors
Finally, we can see that sdb is no longer listed and the state has returned to ONLINE. Don’t forget to turn off the flashing light via $ sudo ledctl locate_off=/dev/sdb.
The steps previously taken can be done again when the new HDD has finished resilvering for the sdc and sdd drives in the future. In the future it would be wise to label and note where each drive is so that way future changes and or replacements, can be fixed faster.
Conclusion
We have learned how to locate, identify, and replace a storage device in a server chassis. It was a simple process but takes some time to find out which devices is the one we are needing to work with. For those that don’t run server chassis hardware my recommendation is to label, label, label.