My MikroTik Firewall Rules
I wanted to show a little firewall rule that I setup that will allow an entity to attempt to login via SSH or Winbox and have them locked out for 21 days after so many attempts. You can tweak this to allow for more attempts and or have them locked out indefinably. This might be considered a tar pit for those that know that term except this is a manual tar pit that acts a little differently than the one MikroTik has built-in.
Winbox lockout after 5 failed attempts
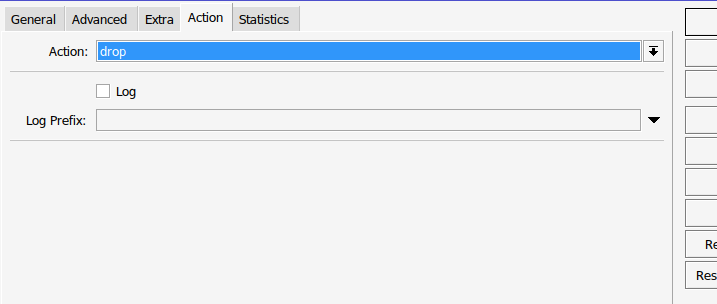
Here is a pic of my firewall rule that will allow for 5 attempts via Winbox and 3 attempts via SSH after which will lock out that IP address for 21 days.
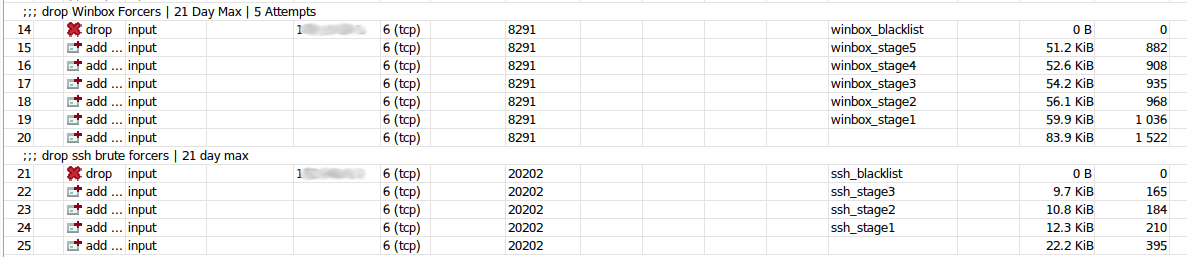
The first rule that needs to be setup is number 20 on the list. The way the rules are read as with many other programs/firewalls is from top to bottom. The way this one works is it looks at line 14 and sees if there is any IP address in the winbox_blacklist Source Address List and if not it will check the winbox_stage5 and so on until we get to line 20 which we will call stage0.
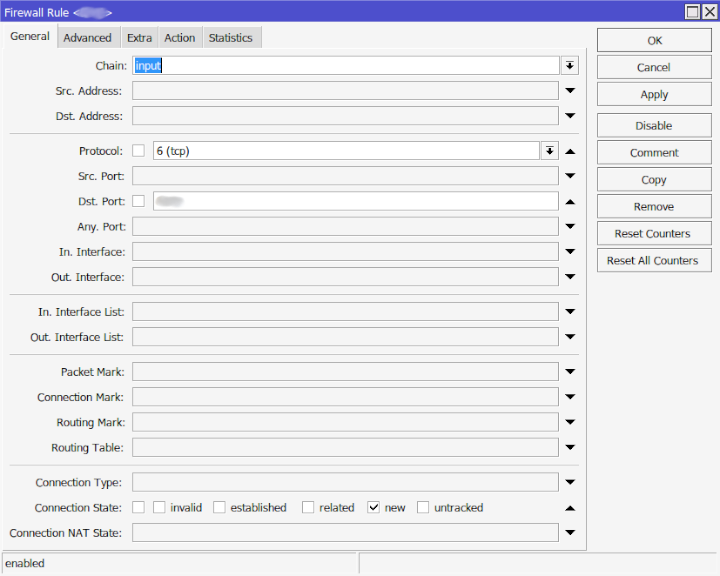
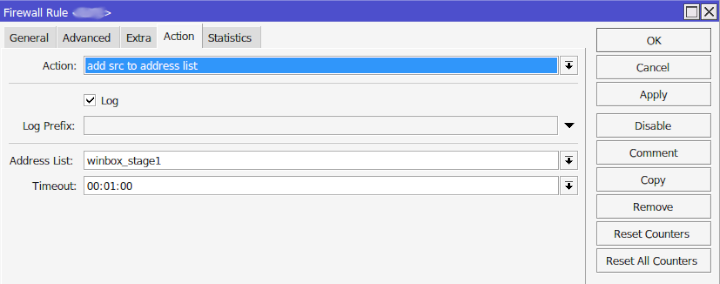
The above pictures show the general and action firewall rules. Below is the command line syntax to the first rule, stage0, which is not named but will then bump any offender to stage1 which is named.
;;;
 /ip firewall filter add chain input=action action=add-src-to-address-list connection-state=new protocol=tcp address-list=winbox_stage1 address-list-timeout=1m dst-port=(your port) log=yes log-prefix=""
What we are doing here is setting the rule as an input since this means it hits directly to the router. A chain=forward means its passing the router and heading to another device. Protocol is TCP, and the port is the port you have setup for Winbox. The default is 8291 but can and should be changed to something else. connection-state=new means any new connection and not a current connected one should be tracked, since that will most likely be you.
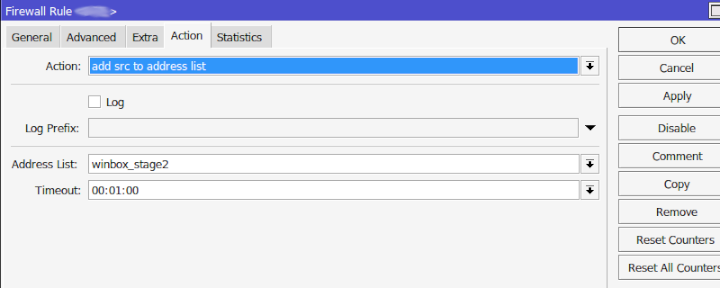
The action tab says it will add the src of the IP to an address list which means the IPs will be added to the address-list called winbox_stage1 which is found under /ip firewall address-list and will stay there for 1 minute. If they attempt and fail again within the 1 minute they will be bumped to winbox_stage1.
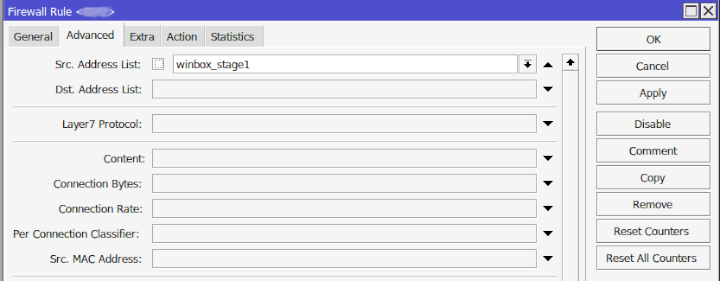
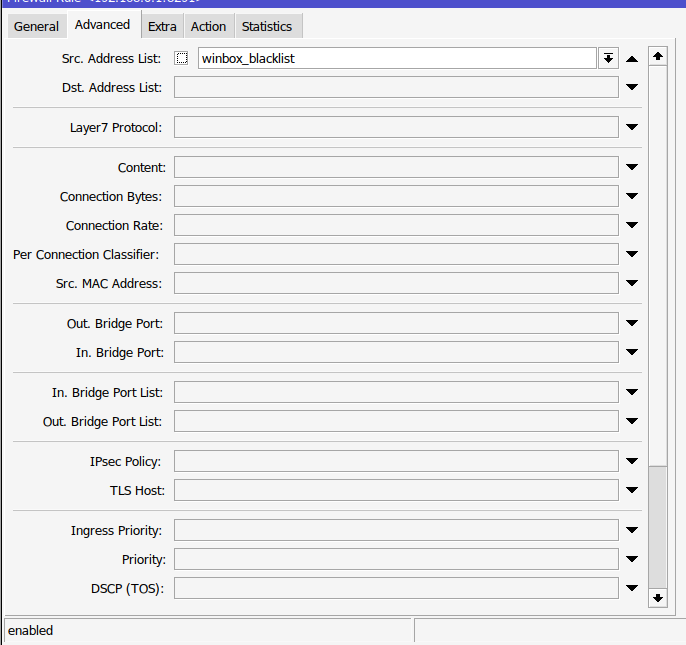
Winbox_stage1 is the same as stage0 but now will pull from the src-address-list=winbox_stage1 and place any offenders of statge1 in winbox_stage2 and so on until we get to stage5 where the IP is locked for 21 days and is moved to the winbox_blacklist address-list. Further down I show what the final blacklist rule does (firewall rule #14).
In this next example are the IP addresses that have failed and are in my 21 day timeout.
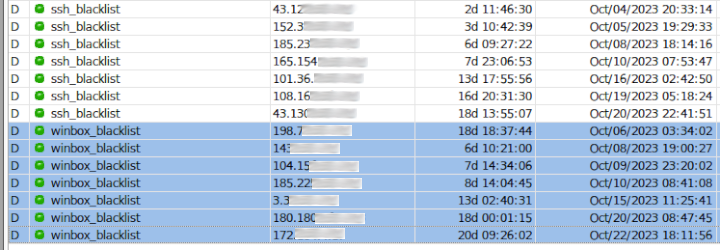
I’ve obscured the IPs even though they shouldn’t be as these are bots scanning the network but I didn’t want anyone to be able to cross reference their IPs with the time that my router locked them out and single me out and try attacking my front door harder.
Devices that are currently going through the stages will appear here too but they only will show up for the max of 5 minutes before they are put in the blacklist.
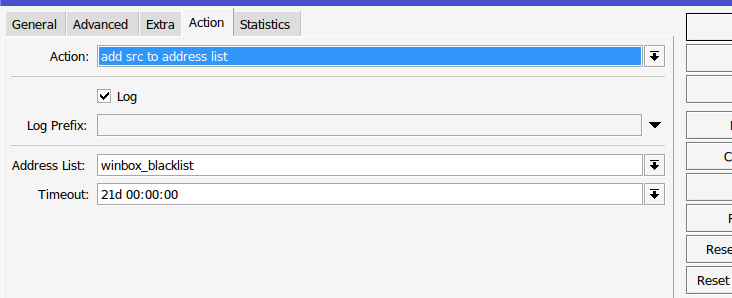
And finally here is my blacklist rule after the winbox_stage5 attempt.
The rules are the same except for a few things like the connection-state is empty and we now fully drop all connections from this IP until their 21 days are up.
;;; drop Winbox Forcers | 21 Day Max | 5 Attempts
chain=input action=drop protocol=tcp dst-address=(IP of your router) src-address-list=winbox_blacklist dst-port=(your winbox port) log=no log-prefix=""
Setting up an allow list
One very important thing is to setup an allow list that way you don’t get blocked out of sessions and or IPs that you can “trust”. To do so go to IP -> Services -> and disable the services you don’t need and or change the ports to the services you do need if you want. I edited the SSH and the winbox ones and added the Available From IPs as show below.
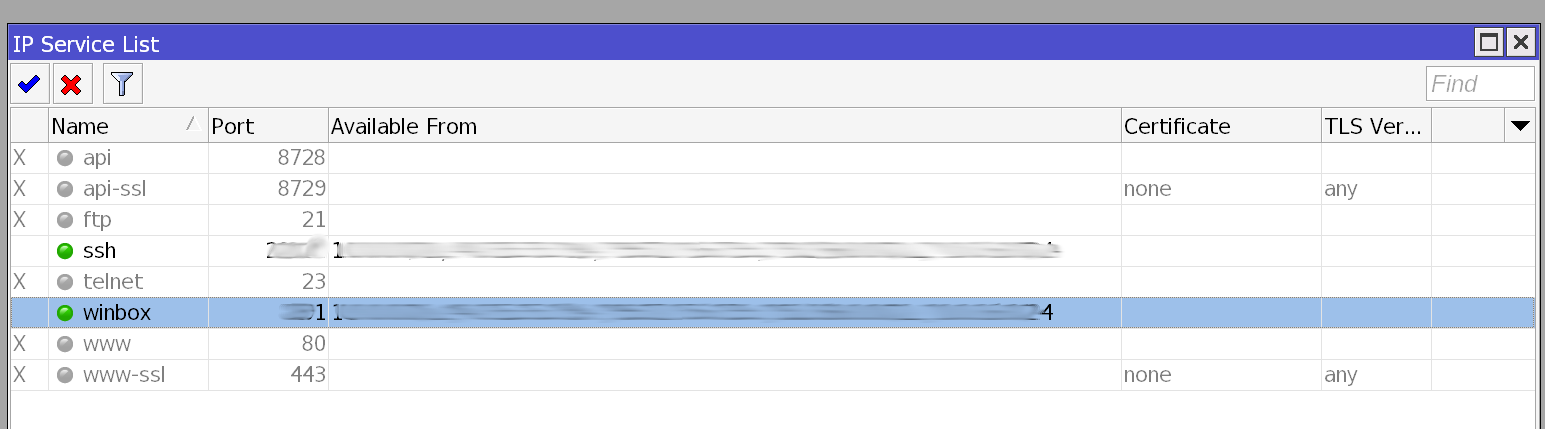
I have disable api, api-ssl, ftp, telnet, www, and www-ssl as I don’t want them open or used on my router.
The following is a little redundant but should still be implemented
Due to the way MikroTik works, you can and should also setup an allow list under IP -> Firewall -> Address Lists. Basically you will type in the name of the rule in this case, ssh-access or winbox-access and the address to the device that will be trying to connect to this MikroTik router. You will need to do this for each IP and or network range, ie., 192.168.1.0/24.
Once those are created you will create a rule like this:
;;; Winbox-Access
chain=dstnat action=dst-nat to-addresses=10.0.15.1 to-ports=(your-winbox-port) protocol=tcp dst-address=(your-WAN-IP) src-address-list=winbox-access dst-port=(your-winbox-port) log=yes log-prefix="
The src-address-list will be checked every time an SSH session or Winbox session is made and if one of those are part of those created in the Address Lists then it will pass it to the firewall next and allow it through. The same setup will be made for SSH. Just change to your IP and ports without the ().
;;; SSH-Access
chain=dstnat action=dst-nat to-addresses=10.0.15.1 to-ports=(your-ssh-port) protocol=tcp dst-address=(your-WAN-IP) src-address-list=ssh-access dst-port=(your-ssh-port) log=yes log-prefix=""
Other firewall rules
This concept can be used for other port and protocols that you want to corral. SSH is another important one if you have it open to the world. Copy the steps above to create the SSH rule, add the failed attempts to an address list with a timer and so one until you want to lock out the IP sources and for the most part you are much more secure than you were before.
Unfortunately with MikroTik there is no one command or trick to get all of this working easily. You are going to need to interact with the system on several tabs and windows to get it all to work but once you understand the basics its very easy and simple to add more.