Gitea Setup and Install on Ubuntu 20.04 and Others

After an exhaustive exercise of finger tapping on my keyboard and several attempts to clear my head by walking away from the computer, I have finally setup a Gitea instance. Following the how-tos online seemed simple enough.  Follow the steps, install a user, setup permissions, download a file and bam you are good to go. But that is the furthest from the truth for my experience. I have followed what seemed to be ten different how-tos that somehow seem to differ even between the same distro install. Each of which if you were setting up a server on your local machine would work but in my case of setting it up on my Linode instance where you have no access to the GUI and or a web interface that is able to look at the localhost or 127.0.0.1 it was just was nigh impossible. The logs showed I was reaching the server every time but still nothing showed up. But I digress.
This blog is designed to help my fellow travelers that have similar issues and for myself to recall just how I set something up after its been some time.
The Install
Seach google about how to install Gitea on your distro flavor of choice and you will find there are basically two way to do it. One is a snap (boo) and the other is from scratch. Like I always do I started on the path of building from scratch.
Step 1
Create a git system user
The adduser is a Ubuntu command and as such this setup may not exactly the same for you distro. The universally useradd command which I prefer can be used but you’d have to get the syntax correct to match the one below.
$ sudo adduser \
   --system \
   --shell /bin/bash \
   --gecos 'Git Version Control' \
   --group \
   --disabled-password \
   --home /home/git \
   git
Or the one-liner:
$ sudo adduser --system --shell /bin/bash --gecos 'Git Version Control' --group --disabled-password --home /home/git git
Step 2
Install MariaDB
$ sudo apt install mariadb-server
If you have already ran mysql_secure_installation skip this next step.
$ sudo mysql_secure_installation

Change the root password? [Y/n] y
...
Remove anonymous users? [Y/n] y
...
Disallow root login remotely? [Y/n] y
...
Remove test database and access to it? [Y/n] y
...
Reload privilege tables now? [Y/n] y
...

...
Thanks for using MariaDB!
Next let’s setup the new gitea user and privileges;
$ sudo mysql -u root -p
create database gitea;
grant all privileges on gitea.* to 'gitea'@'localhost' identified by "StrongPassword";
grant all privileges on gitea.* to 'gitea'@'127.0.0.1' identified by "StrongPassword";
flush privileges;
quit;
I’d suggest to add the 127.0.0.1 now since it will be needed later. Also you don’t have to use uppercase when using MySQL/maria. It is not case dependent. Those that use the uppercase in their how-tos either don’t know or only copy and paste what others are doing. Other SQL programsthough, might not be that forgiving.
Step 3
Install Gitea and setup some directories
Make sure to get the latest version by visiting their website or using their GitHub page
$ cd /tmp
$ wget https://dl.gitea.io/gitea/1.17.3
$ mv 1.17.3 gitea
$ sudo mv gitea /usr/local/bin
$ sudo chmod +x /usr/local/bin/gitea

$ sudo mkdir -p /var/lib/gitea/{custom,data,log}
$ sudo chown -R git:git /var/lib/gitea/
$ sudo chmod -R 750 /var/lib/gitea/
$ sudo mkdir /etc/gitea
$ sudo chown root:git /etc/gitea
$ sudo chmod 770 /etc/gitea
Step 4
Create a Gitea Systemd Service
$ sudo vim /etc/systemd/system/gitea.service

[Unit]
Description=Gitea
After=syslog.target
After=network.target

[Service]
RestartSec=3s
Type=simple
User=git
Group=git
WorkingDirectory=/var/lib/gitea/

ExecStart=/usr/local/bin/gitea web -c /etc/gitea/app.ini
Restart=always
Environment=USER=git HOME=/home/git GITEA_WORK_DIR=/var/lib/gitea

[Install]
WantedBy=multi-user.target
Next reload and enable the service now.
$ sudo systemctl daemon-reload
$ sudo systemctl enable --now gitea
Step 5
Install and configure Ngnix and git
$ sudo apt -y install nginx git
If you have ufw installed run the following, if not I’d highly recommend it.
$ sudo ufw allow 'Nginx Full'

or

$ sudo ufw allow http https
#### these basically do the same things
Here is where things diverge from what the other how-tos say to do but that did not work for me.
Setup the reverse proxy for the site. Change git.example.com for the domain name you will be using. This is my nginx config minus my domain name but the most important part seems to be the upstream line and the root /var/lib/gitea/public line since no other how-to seemed to have any of those lines added. The official gitea site did reference this but not in as full detail as here.
$ sudo vim /etc/nginx/conf.d/git.example.com.conf

upstream gitea {
server 127.0.0.1:3000;
}
server {
server_name git.example.com www.git.example.com;
root /var/lib/gitea/public;
access_log off;
error_log off;
location / {
try_files maintain.html $uri $uri/index.html @node;
}
location @node {
client_max_body_size 0;
proxy_pass http://localhost:3000;

proxy_set_header X-Forwarded-For $proxy_add_x_forwarded_for;
proxy_set_header X-Real-IP $remote_addr;
proxy_set_header Host $http_host;
proxy_set_header X-Forwarded-Proto $scheme;
proxy_max_temp_file_size 0;
proxy_redirect off;
proxy_read_timeout 120;
}
}
$ sudo systemctl restart nginx
Step 6
Head to your domain
For my first install I had to head to git.example.com:3000 which then let me enter the config page for gitea.
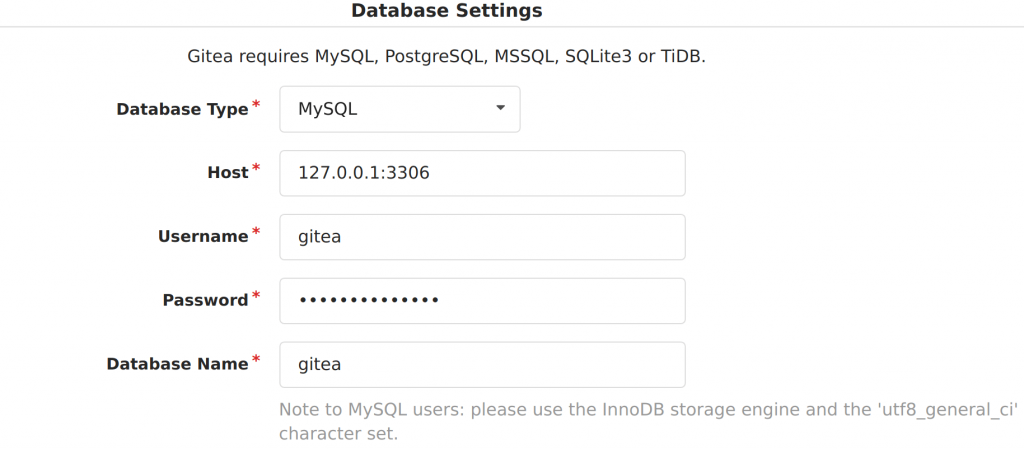
You can leave pretty much all the setting the same.
After setting that up you might see an error where the URL in app.ini is not correct. To fix this head to /etc/gitea/app.ini and change these settings:
...
[server]
DOMAIN      = git.example.com
ROOT_URL    = https://git.example.com
...
I also disabled the setting that allow for other users to register. Since this is my server and no one esle show have access I will be disabling it.
[service]
...
DISABLE_REGISTRATION = true

[openid]
ENABLE_OPENID_SIGNIN = false
ENABLE_OPENID_SIGNUP = false
Here is my entire /etc/gitea/app.ini:
APP_NAME = Gitea: Git with a cup of tea
RUN_USER = git
RUN_MODE = prod
WORK_PATH = /var/lib/gitea

[database]
DB_TYPE = mysql
HOST = 127.0.0.1:3306
NAME = gitea
USER = gitea
PASSWD = somedbpasswd
SCHEMA =
SSL_MODE = disable
CHARSET = utf8
PATH = /var/lib/gitea/data/gitea.db
LOG_SQL = false

[repository]
ROOT = /var/lib/gitea/data/gitea-repositories
DISABLE_STARS = false

[server]
SSH_DOMAIN = git.example.com
DOMAIN = git.example.com
HTTP_PORT = 3000
ROOT_URL = https://git.example.com/
LANDING_PAGE = example
DISABLE_SSH = false
SSH_PORT = 22
LFS_START_SERVER = true
LFS_JWT_SECRET = somelfsjwtsecret
OFFLINE_MODE = false

[lfs]
PATH = /var/lib/gitea/data/lfs

[mailer]
ENABLED = false

[service]
REGISTER_EMAIL_CONFIRM = false
ENABLE_NOTIFY_MAIL = false
DISABLE_REGISTRATION = true
ALLOW_ONLY_EXTERNAL_REGISTRATION = false
ENABLE_CAPTCHA = false
REQUIRE_SIGNIN_VIEW = false
DEFAULT_KEEP_EMAIL_PRIVATE = false
DEFAULT_ALLOW_CREATE_ORGANIZATION = true
DEFAULT_ENABLE_TIMETRACKING = true
NO_REPLY_ADDRESS = noreply.localhost

[picture]
DISABLE_GRAVATAR = false
ENABLE_FEDERATED_AVATAR = true

[openid]
ENABLE_OPENID_SIGNIN = false
ENABLE_OPENID_SIGNUP = false

[session]
PROVIDER = file

[log]
MODE = console
LEVEL = info
ROOT_PATH = /var/lib/gitea/log
#ROUTER = console
logger.router.MODE = console

[repository.pull-request]
DEFAULT_MERGE_STYLE = merge

[repository.signing]
DEFAULT_TRUST_MODEL = committer

[security]
INSTALL_LOCK = true
INTERNAL_TOKEN = someinteraltoken
PASSWORD_HASH_ALGO = pbkdf2

[metrics]
ENABLED = true

[oauth2]
JWT_SECRET = somejwtsecret
The ROUTER config under [log] is no longer used. logger.router.MODE is now the correct way to set mode to console.
Step 7
Restart the Gitea service.
$ sudo systemctl restart gitea